Odoo ePOS Receipt Printer Setup
🖨️ Epson TM-* Receipt Printer – Secure HTTPS Setup for Odoo POS
Purpose
To enable trusted HTTPS communication between Odoo POS and Epson TM-* printer, by installing a self-signed certificate that includes a valid IP-based Subject Alternative Name (SAN).
📋 Prerequisites
- A Linux/macOS system with openssl installed (or WSL on Windows)
- Access to Epson printer web UI (http://192.168.x.x)
- Admin access to the PC and printer
🛠 Step-by-Step Instructions
1. Create OpenSSL config file with IP SAN
Save as epson_ip.cnf:
[req]
default_bits = 2048
prompt = no
default_md = sha256
distinguished_name = dn
x509_extensions = v3_req
[dn]
C = JP
O = SEIKO EPSON CORP.
CN = 192.168.123.210
[v3_req]
subjectAltName = @alt_names
[alt_names]
IP.1 = 192.168.123.210** Update the IP address as needed (192.168.123.210 is used as an example here)
2. Generate private key and certificate with SAN
openssl req -x509 -nodes -days 3650 \
-newkey rsa:2048 \
-keyout epson.key \
-out epson.crt \
-config epson_ip.cnf \
-extensions v3_req3. Package into a .pfx (PKCS#12) file
openssl pkcs12 -export \ -inkey epson.key \ -in epson.crt \ -out epson.pfx \ -name "Epson IP Cert"
- Set a password when prompted
- Remember this password — you'll use it in the Epson UI
4. Upload Certificate to Printer
- Go to: http://192.168.123.210 -> Printer IP
-
Navigate to: Security → Server Certificate → Import
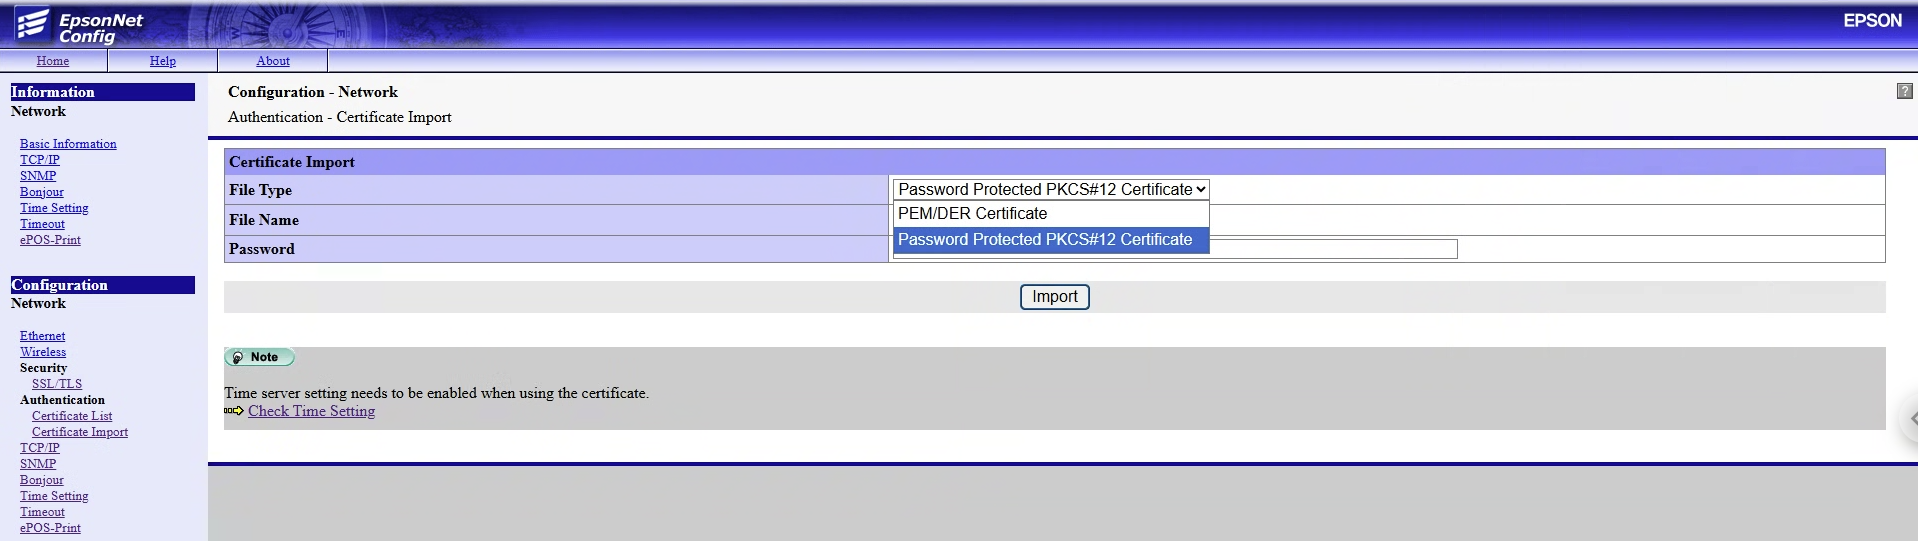
-
Upload the epson.pfx file
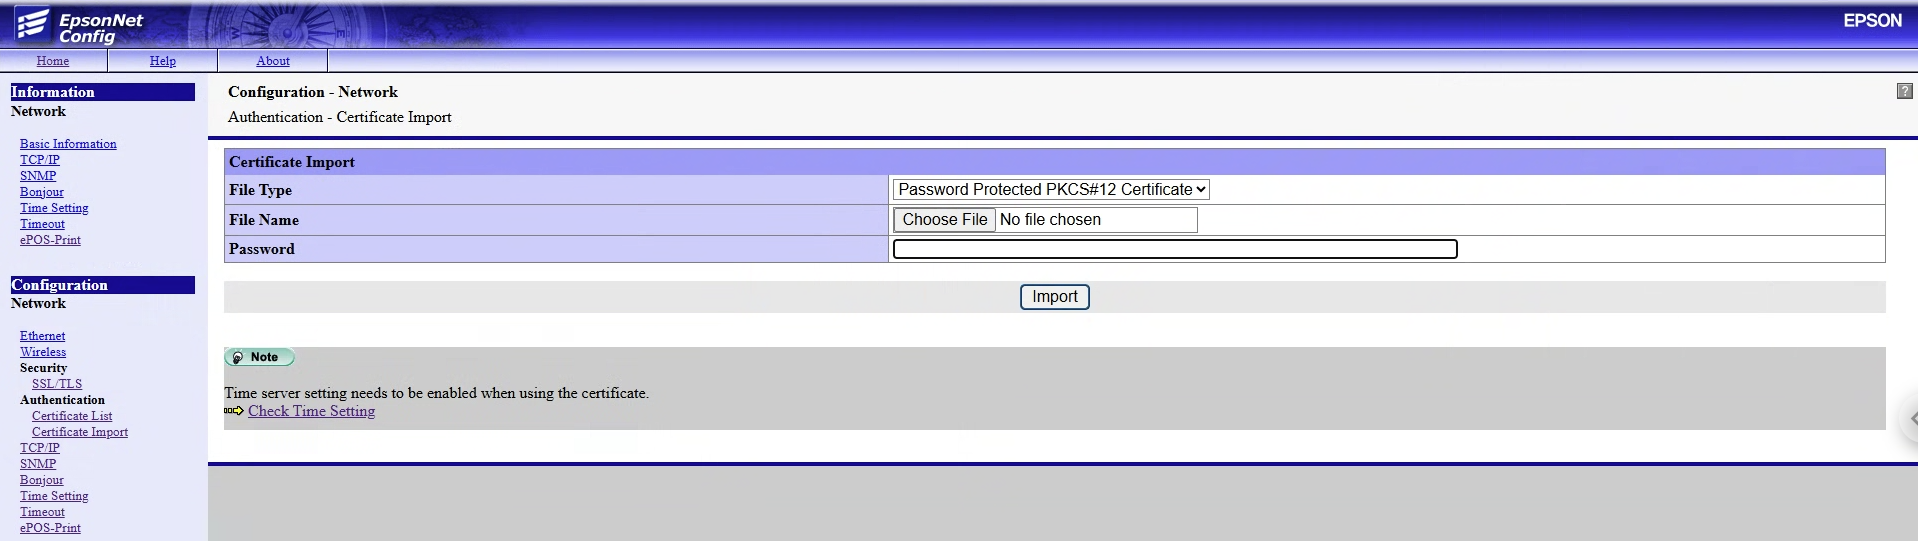
- Enter the password used during export
- Apply and reboot if required
- Set the Server Certificate
Under SSL/TLS set the server certificate to CA-Signed Certificate, that was uploaded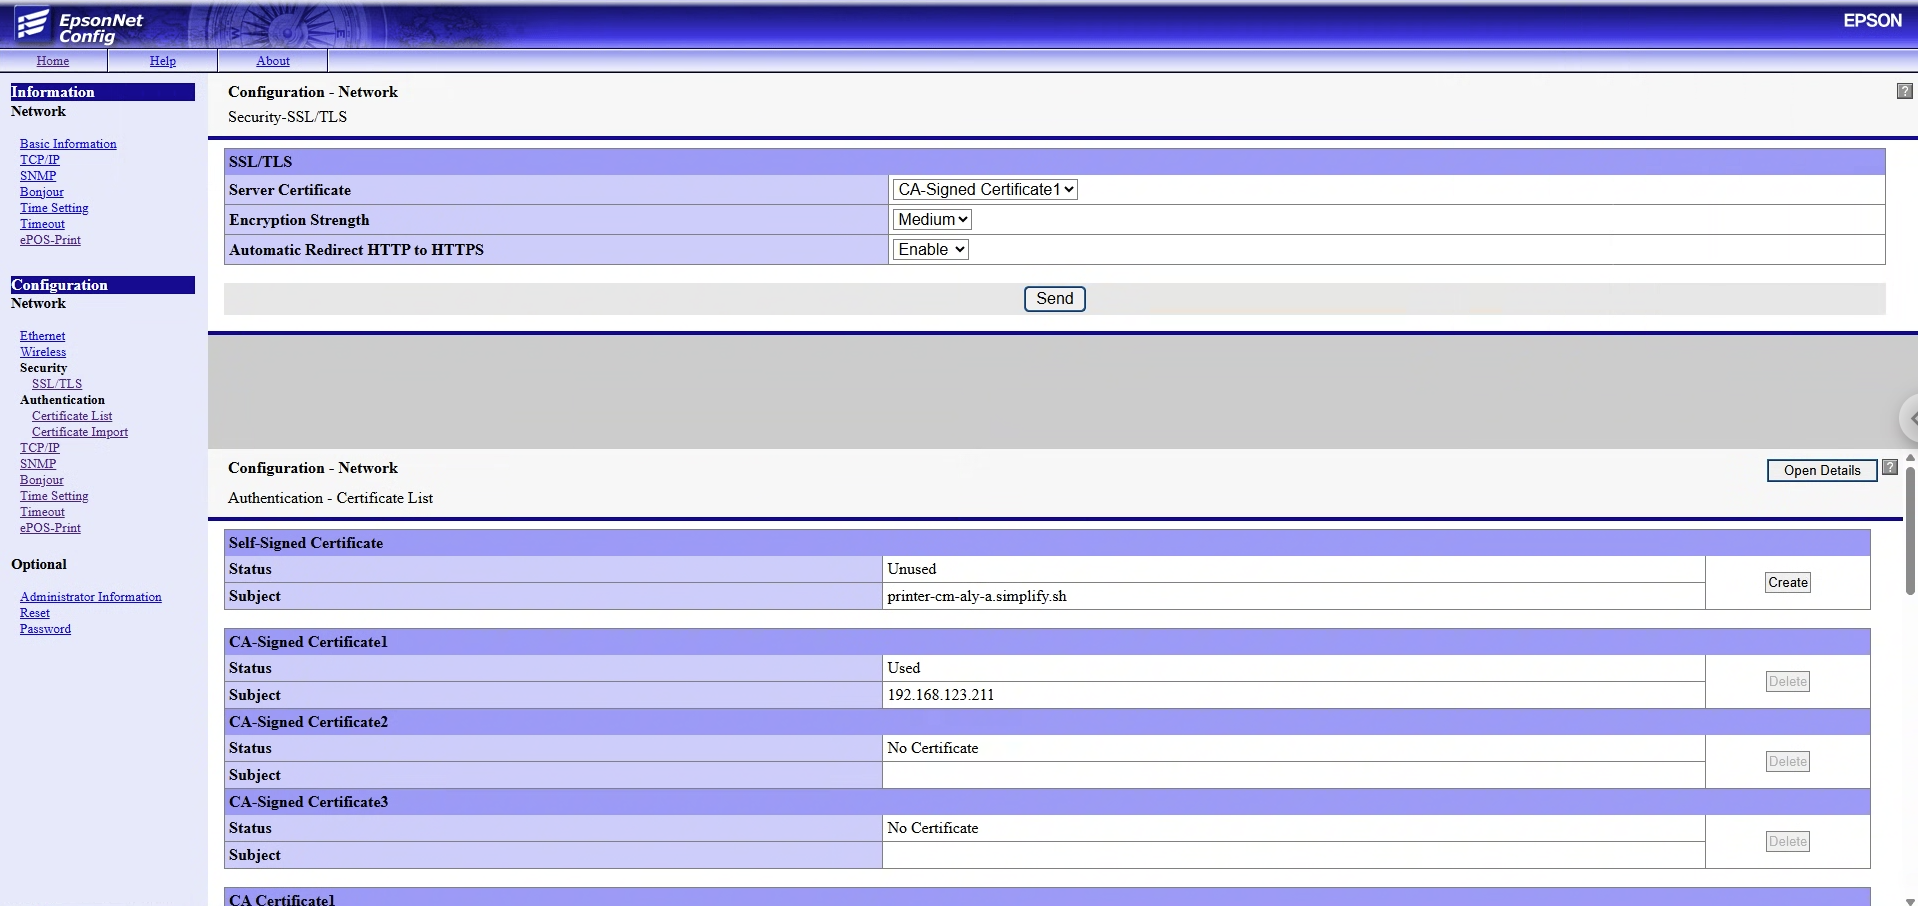
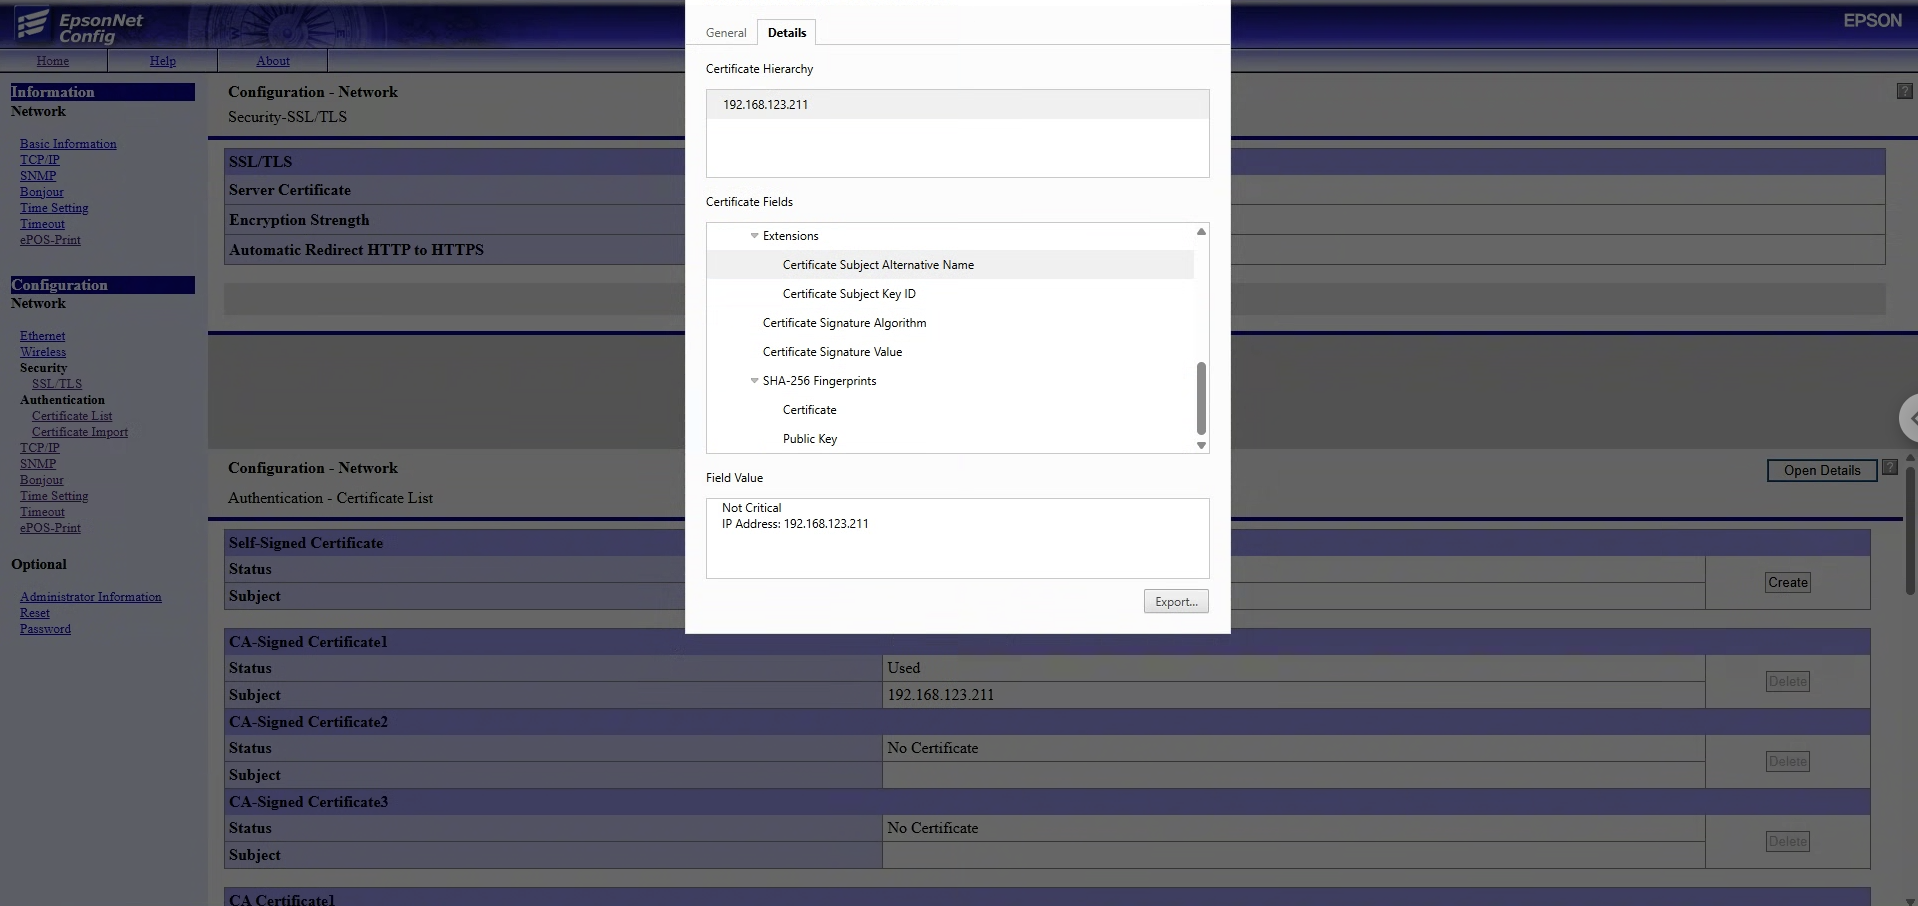
✅ Verification
- Visit https://printer-ip in browser
-
Certificate should show:
- CN = IP address
- SAN = IP address
- No ERR_CERT_COMMON_NAME_INVALID in Chrome/Firefox
🔐 Export the certificate from chrome
https://www.odoo.com/documentation/18.0/applications/sales/point_of_sale/configuration/epos_ssc.html
🔐 Trust the Cert in Windows
- Double-click epson.crt on Windows
- Click Install Certificate
- Choose Trusted Root Certification Authorities
- Finish wizard and restart browser
Odoo POS will be able to communicate to receipt printers now.
⚠️ Why Not to Use Epson's Built-in Self-Signed Certificate
The default self-signed certificate generated by Epson printers (like TM-T20II) should not be used as-is because:
-
🚫 No Subject Alternative Name (SAN)
- Modern browsers (Chrome, Edge, etc.) require a SAN.
- Epson’s built-in cert only has a Common Name (CN), which is ignored.
-
❌ Causes ERR_CERT_COMMON_NAME_INVALID
- Even if the CN matches the printer IP or hostname, Chrome will reject it.
-
🔒 Breaks Secure POS Integrations
- Browsers and systems refuse to trust the printer over HTTPS.
- Odoo POS or other frontend apps may show security warnings or block requests.
-
🧱 Certificate Cannot Be Trusted or Replaced
- You can’t upload a replacement cert unless it includes the private key.
- Self-generated cert from Epson has a private key that cannot be exported.